Homemade Butter: Easy Step-by-Step Guide for Creamy Perfection
- Homestead Maven

- Feb 7, 2024
- 8 min read
Learn How to Make Homemade Butter Using Simple Ingredients and Transform Fresh Cream into Delicious, Creamy Goodness with This Easy DIY Recipe!
Hey there, lovely readers! In some of our blog posts, you'll find affiliate links to products we genuinely adore. When you make a purchase through these links, we earn a small commission, helping us keep our blog running and sharing valuable content with you. Thank you for your support!

Let’s talk butter—not the store-bought kind wrapped in foil, but rich, creamy, homemade butter that you whip up yourself. Why, you ask? It all started during the holidays when finding butter at my local market was nearly impossible. Seriously, the shelves were empty! To make matters worse, heavy cream was flying off the shelves too. Luckily, I had some raw milk and cream from my local farmer’s market, and that’s when it hit me—why not make homemade butter from scratch?
Let me tell you, making butter at home is a game-changer. It’s lighter, creamier, and fresher than anything you’ll find at the store. Plus, the possibilities for flavored butters are endless. Some of my personal favorites are cinnamon honey butter for a sweet kick, rosemary sea salt butter for a savory twist, and garlic herb butter for cooking.
If you’ve never tried making your own butter, trust me, you’re in for a treat. It’s surprisingly simple, and the results are absolutely worth it. Stick around, and I’ll walk you through everything you need to know, from choosing the right cream to mastering the butter-making process. You’ll have creamy, delicious homemade butter in no time!
Ingredients and Equipment You’ll Need
Making homemade butter requires just a handful of ingredients and some basic kitchen tools. Whether you’re using fresh cream from your local farmer’s market or heavy whipping cream from the store, you’ll be amazed at how simple it is to create creamy, delicious butter from scratch. Here’s what you’ll need to get started:
Ingredients
Heavy Cream or Heavy Whipping Cream: The star of the show! Fresh cream yields the best results, and if you can get raw milk cream from a local farm, even better. It’s richer in nutrients and adds a beautiful depth to the butter’s flavor.
Pinch of Salt (Optional): If you prefer salted butter, a touch of salt enhances the flavor and makes it perfect for spreading on warm bread or baking.
Equipment
Stand Mixer: A reliable stand mixer is the easiest way to whip up butter without breaking a sweat. We’ll dive into the stand mixer options we love in the next section!
Mixing Bowl: A large mixing bowl to contain the cream as it transforms into butter.
Strainer or Cheesecloth: You’ll need this to strain out the buttermilk after the butter has separated.
Ice-Cold Water: Used to rinse the butter and remove any remaining buttermilk, ensuring it stays fresh longer.
Wooden Spoon or Spatula: For pressing and kneading the butter as you rinse it. Wooden tools are gentle and won’t affect the texture. This is the set I have my heart set on and plan to swap over to soon.
Glass Jar or Container: Store your finished butter in an airtight container to keep it fresh. Glass jars are perfect for the job!
Unbleached Parchment Paper: I like to wrap and shape mine in unbleached parchment paper!
Gather these ingredients and tools, and you’ll be ready to whip up the freshest, creamiest butter you’ve ever tasted. Trust me, once you see how easy it is, you’ll want to make this a staple in your kitchen!
The Stand Mixer
When it comes to making homemade butter—or just about any kitchen creation—a dependable stand mixer is an absolute must-have. In our household, the 5 Quart Bowl-Lift Stand Mixer has been a workhorse for years. This mixer has seen us through everything from fluffy pancake batter and gooey cookie dough to churned ice cream and, of course, creamy homemade butter. Its sturdy design and ability to handle frequent use make it a staple in our kitchen. Not to mention, the wide range of attachments has saved us both money and space. From pasta-making to shredding cheese, these attachments have been game-changers.
However, as much as I love my trusty 5 quart mixer, we’re definitely due for an upgrade—especially for those larger batches of cookies or butter around the holidays. I’ve had my eye on a few of KitchenAid’s gorgeous newer designs, like the 2022 Design Series Blossom Tilt-Head Stand Mixer and the 2024 Design Series Evergreen Tilt-Head Stand Mixer. These mixers are absolutely stunning, with timeless colors and elegant finishes that make them a centerpiece on any countertop. But as beautiful as they are, they only come with a 5-quart bowl, which can be limiting for big-batch recipes.
That’s why the 7 Quart Bowl-Lift Stand Mixer with Redesigned Premium Touchpoints in the dreamy Milkshake color is also on my radar. With its larger capacity, it’s perfect for making big batches of butter, dough, or anything else we whip up during our busiest kitchen days. The thought of owning both the 2024 Evergreen mixer and the 7-quart Bowl-Lift mixer is tempting (imagine the versatility!), but let’s be honest—spending over $1200 on mixers isn’t exactly thrilling.
KitchenAid’s mixers are an investment, but one I’ve never regretted. With the attachments and durability, they’ve been worth every penny. In fact, I’m planning an entire post soon dedicated to my favorite stand mixer attachments because they’ve truly been lifesavers in my kitchen. Whether you’re new to butter-making or a seasoned baker, choosing the right mixer can make all the difference—and I’m excited to upgrade to the perfect one soon!

Step-by-Step Guide to Making Homemade Butter
Prepare the Cream
Start by letting your heavy cream sit at room temperature for about an hour. This step is key—it allows the cream to warm up slightly, which speeds up the butter-making process. If you’re using raw cream from a local farm, this step is even more important for achieving that perfect texture.
Set Up Your Mixer
Pour the heavy cream into your mixing bowl, and attach the whisk or paddle attachment to your stand mixer. Start the mixer on low speed to avoid splattering, then gradually increase to medium-high speed as the cream thickens.

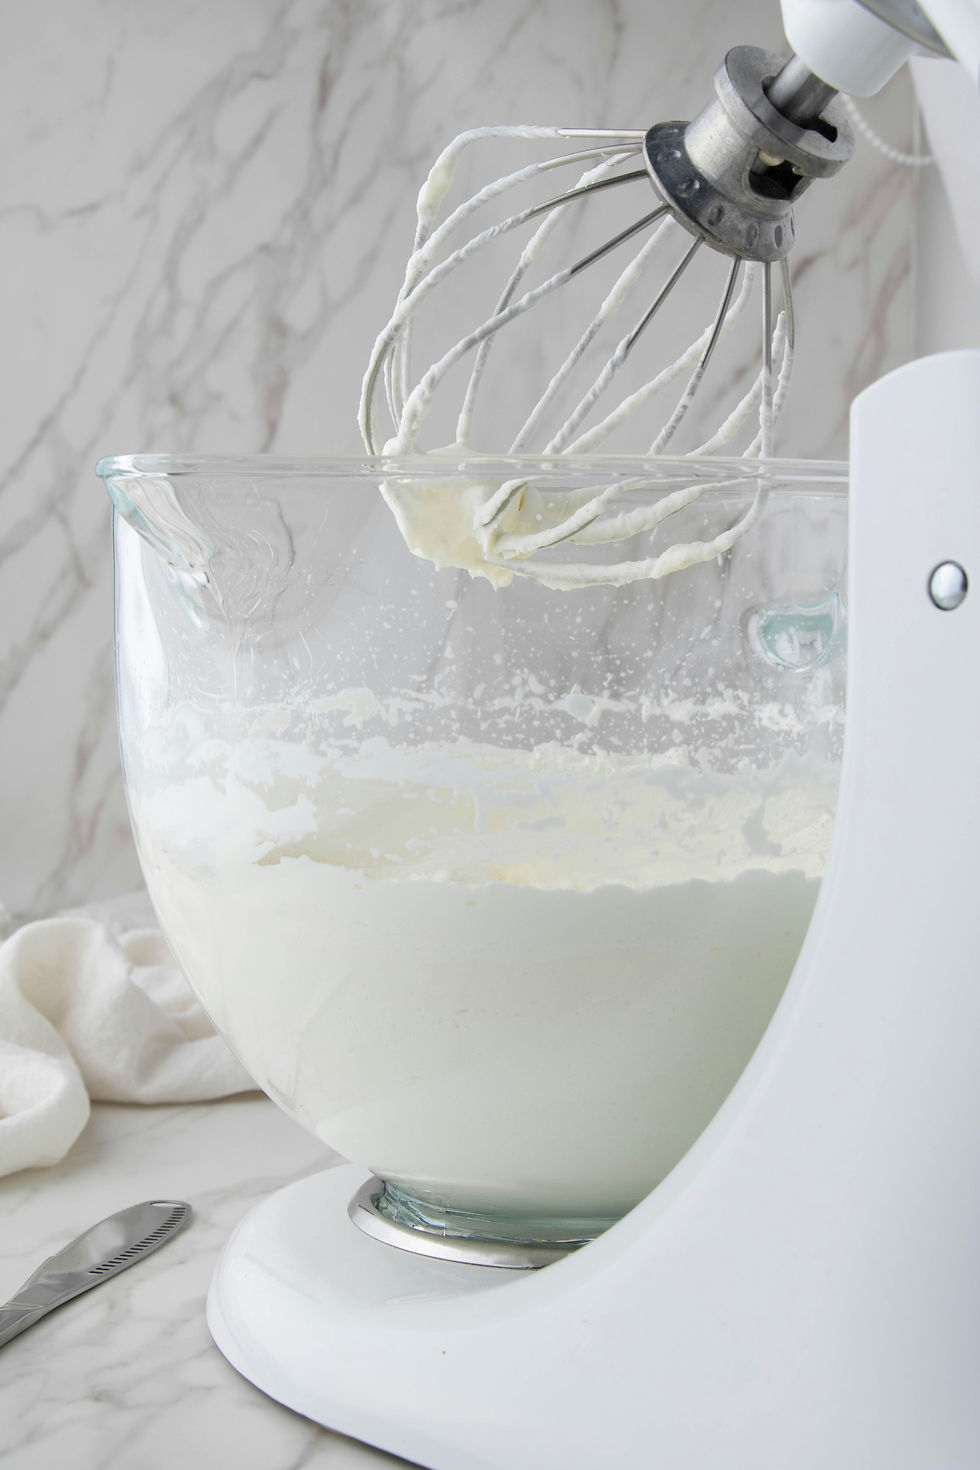
Whip the Cream
As the mixer works its magic, you’ll notice the cream go through a few stages:
Soft Peaks: The cream will begin to thicken and hold its shape lightly.
Stiff Peaks: This is the whipped cream stage, where the cream is thick and fluffy.
Keep mixing past the whipped cream stage, and you’ll soon notice the mixture becoming grainy. This is the fat separating from the liquid buttermilk—a sign you’re almost there!
Watch for the Separation
The butter will begin to solidify, and you’ll see the buttermilk separating as a pale liquid. The mixture will look grainy, and you’ll hear a distinct sloshing sound. At this point, cover the mixing bowl with a clean kitchen towel to prevent splattering. Let the mixer run until the butter forms a cohesive clump.
Drain the Buttermilk
Once the butter has fully separated, pour off the buttermilk. Don’t toss it—it’s a fantastic ingredient for baking pancakes, biscuits, or waffles!
Rinse the Butter

Add ice-cold water to the mixing bowl with the butter. Use a spatula or your hands to knead the butter, pressing out the remaining buttermilk. Drain the cloudy water and repeat the process with fresh cold water until it runs clear. This step is crucial for extending the shelf life of your butter.
Add Salt
If you’d like salted butter, add a pinch of salt to the rinsed butter. Knead it in thoroughly with your spatula or hands.
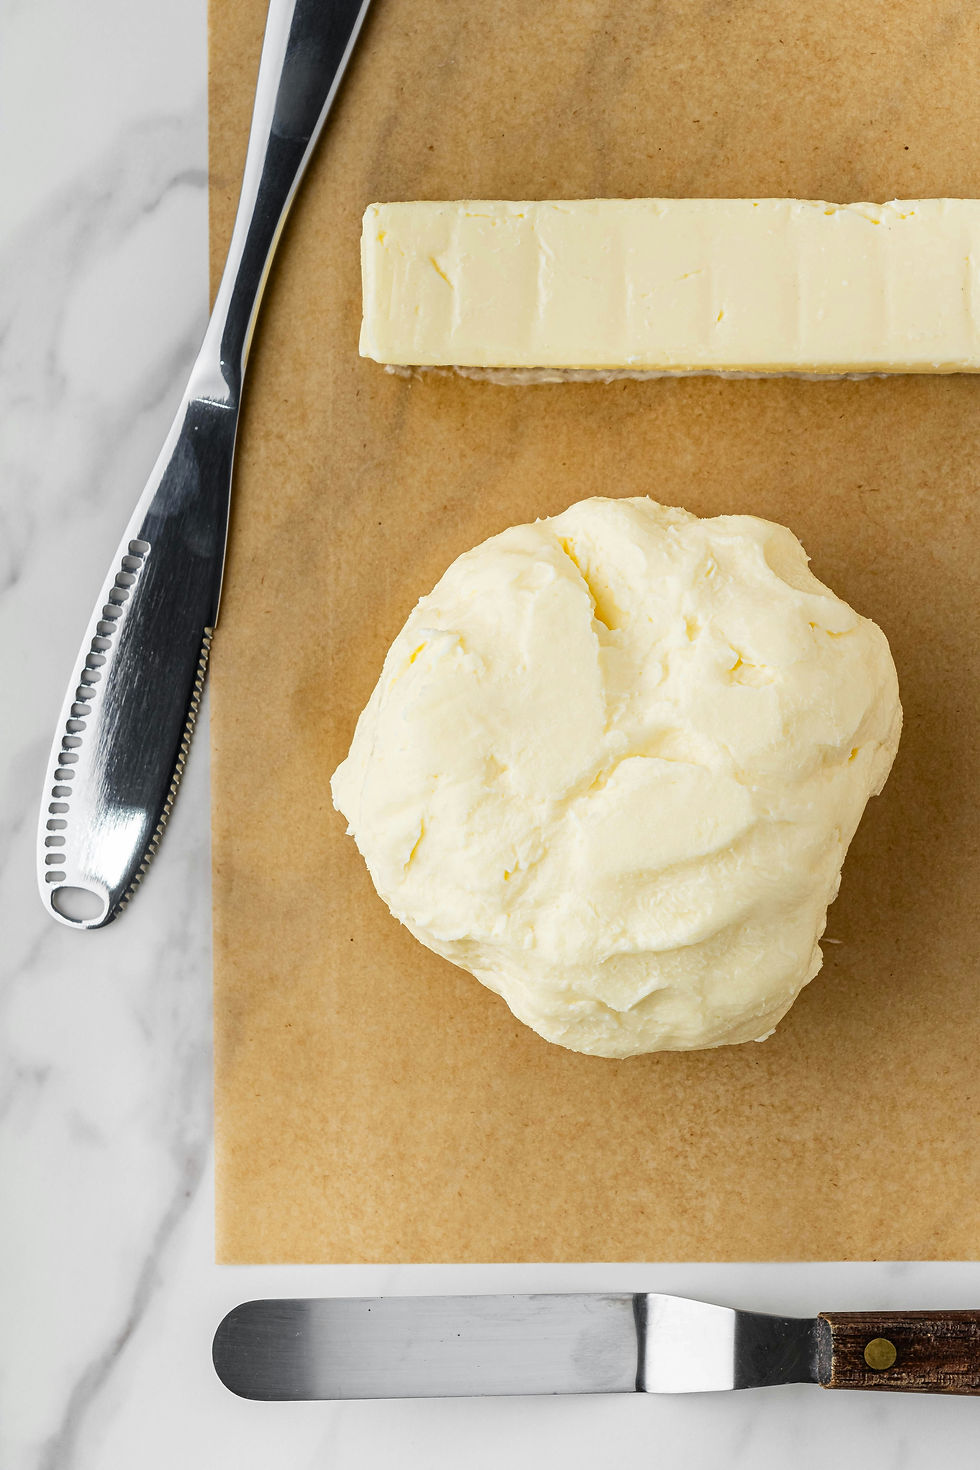
Shape and Store
Pat the butter dry with a paper towel to remove excess moisture. Shape it into a block or press it into a container for storage. Homemade butter will keep in the refrigerator for about one week, or you can freeze it for longer storage. Unsalted butter freezes for up to 12 months, while salted butter is best used within 6 months.
And that’s it—you’ve made your own delicious homemade butter! It’s fresh, flavorful, and ready to use however you like, from spreading on toast to baking your favorite treats. Stay tuned for a future post where we’ll share some creative ways to flavor your homemade butter!
Our Favorite is Raw Milk Butter - Why Use Raw Milk Butter?
Raw milk butter is a game-changer for both your taste buds and overall health. Unlike conventional butter, raw milk butter is packed with nutrients that are often lost during pasteurization. It’s one of the richest and most absorbable sources of Vitamin A, which is crucial for healthy thyroid and adrenal function. It also contains Vitamins E and K, as well as conjugated linoleic acid (CLA), which is known for its cancer-fighting and immune-boosting properties.
The taste of raw milk butter is unparalleled—it has a creamy, rich flavor and a vibrant yellow hue that’s a sign of its high beta-carotene content. This golden color comes from grass-fed cows, whose milk is naturally richer in nutrients. Once you’ve tried it, it’s hard to go back to anything else!
When working with raw milk, proper handling and safety are essential. Always source your milk from a trusted local farm or farmers market. Ensure that the milk is handled and stored safely to maintain its quality. For those new to raw milk butter, stay tuned for our upcoming post where we’ll walk you through how to make it using your KitchenAid mixer.
Tips and Tricks for Butter Perfection
Use the Freshest Cream: Fresh cream yields the best-tasting butter. If you can, use raw cream from grass-fed cows for a richer flavor and nutrient boost.
Get Creative with Flavors: Enhance your butter with herbs like rosemary or thyme, sweeten it with honey, or add a pinch of cinnamon for a unique twist. Flavored butter is perfect for spreading on bread or adding to recipes.
Experiment with Equipment: If you don’t have a stand mixer, don’t worry! A hand mixer, food processor, or even a mason jar (for a hands-on approach) can work just as well.
Storing Your Homemade Butter
Proper storage ensures that your homemade butter stays fresh and flavorful:
Refrigeration: Store butter in an airtight container in the fridge for up to one week.
Freezing: For longer storage, wrap butter tightly in parchment paper, then place it in a labeled and dated freezer-safe bag. Unsalted butter freezes beautifully for up to 12 months, while salted butter is best used within 6 months.
Pro Tip: Cut butter into smaller portions before freezing. This makes it easier to thaw only what you need.
While homemade butter isn’t always cheaper than store-bought (especially if cream prices are high), the benefits far outweigh the cost. There’s a unique satisfaction in knowing exactly what’s in your butter and the joy of creating something fresh and wholesome from scratch. The taste is incomparable—lighter, creamier, and free from unnecessary additives.
Making your own butter also opens up a world of possibilities, from customizing flavors to experimenting with textures. Plus, it’s a fantastic way to connect with traditional methods and appreciate the simplicity of homemade foods.
We encourage you to give it a try! Whether you’re using store-bought cream or fresh raw cream, making homemade butter is an experience that will leave you hooked.
Have you tried making butter at home? Share your experience in the comments below—we’d love to hear how it went! Don’t forget to subscribe for updates on our newest recipes and to learn all about our favorite kitchen mixers and attachments.
Disclaimer
When using raw milk, ensure it comes from a safe and reputable source. The information shared in this post is based on personal experience and is not intended to replace professional advice. Always consult with your healthcare provider or local food safety guidelines when working with raw milk or dairy products.


Comments